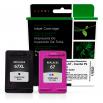
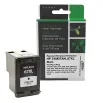
Clover Imaging Remanufactured Black High Yield, Tri-Color Ink Cartridges for HP 67XL/67 (3YP30AN) 2-Pack

Clover Imaging Remanufactured Black High Yield, Tri-Color Ink Cartridges for HP 67XL/67 (3YP30AN) 2-Pack

Comment acheter ces produits?

REVENDEUR

Si vous êtes un client CIG, veuillez connexion ou inscription devenez distributeur.

ENTREPRISE OU CLIENT

S'il vous plaît remplir ce bref formulaire pour être connecté à un revendeur.

ENTREPRISE OU CLIENT

Merci de votre inscription!

Votre demande a été transmise à votre revendeur local de produits Clover Imaging et vous serez contacté dans les 2 jours ouvrables.

Additional Product Information

Technical Specifications

Numéros OEM compatibles croisés:

  • HP 3YM55AN
  • HP 3YM57AN

Dimensions de boite de produit:

  • EA
  • 4.5 in
  • 1.75 in
  • 4.75 in
  • 0.4 lbs

Videos and Downloads

Télécharger:

Dépannage du Produit

Groupes de produits

If you have installed your cartridges and receive an error message stating "Non-HP Chip detected. Cartridges have been blocked by printer firmware" we apologize for the inconvenience. HP has issued a firmware update that affects your printer model and the use of this cartridge.

Please note, to ensure continued operation of your aftermarket printer cartridges, in lieu of firmware updates, please follow these step-by-step instructions to Disable Automatic Firmware Updates on your printer.

To request a replacement item for your printer, please send the following information to support@cartridge-support.com:

1. What printer are you using?
2. Where was your product purchased?
3. What is the cartridge code(s)? (The cartridge codes are located on a small white label on the front or back of the cartridge. There will be 2 rows of numbers only - please include both rows beginning with the top row.) If you have multiple cartridges, please provide all cartridges codes and a replacement will be sent for each code you provide.
4. Shipping address for the replacement product to be shipped to. Please be sure to include city, state and zip code. Once your information is received and verified, replacement product will be shipped via 2nd day service.

To ensure continued operation of your aftermarket printer cartridges, please follow these step-by-step instructions to Disable Automatic Firmware Updates on your printer.

1. On the printers LCD screen, locate the "SETUP" icon on the main screen and press to select.
2. Scroll down and locate "TOOLS or Printer Maintenance" option and press to select.
3. Next, press "Update the Printer" from the available options.
4. Press "Printer Update Options".
5. Choose "Do Not Check”.
6. Do you want to turn on printer updates? Select "NO".

This option prevents the automatic installation of firmware updates that might otherwise eliminate your ability to use aftermarket printer cartridges.

Please note - Not all firmware updates disable cartridges, and some may contain important security updates. We suggest reviewing firmware release notes and periodically checking for critical security updates from your printer manufacturer so you can make an informed decision whether to install a particular firmware revision.***

La cartouche et l’imprimante utilisées dans cette vidéo peuvent ne pas sembler identiques aux vôtres, mais les mêmes procédures utilisées dans cette vidéo peuvent être utilisées pour la cartouche pour laquell vous avez choisi de résoudre les problèmes.

If you encounter an error message stating that the cartridge cannot be recognized, is an incompatible cartridge, the wrong cartridge is installed or if your printer has blinking lights, there may be a simple solution to fix this.

This solution should also be attempted if you receive a message stating that your printer is printing in Single Cartridge Mode.

  • Confirm that the cartridge pictured matches the cartridge you have in your hand or installed in your machine.
  • Confirm that the printer you are using is listed in the printer compatibility table as a compatible printer for the cartridge you are trying to install.
  • If ONE of these TWO criteria do NOT match, you have most likely received the incorrect cartridge for your printer. Please visit our PRINTER COMPATIBILITY page in order to determine what cartridge you need for your machine.
  • Once you have confirmed you have the correct cartridge for your printer, open the cover on the printer and remove the cartridge. 
  • Upon removing the cartridge, you will need to locate the copper contacts. If the copper strip is missing, the cartridge will not function and will need to be replaced. 
  • If the copper strip is intact, you may need to clean the contacts from any type of obstruction or debris as this may be the cause of the error. 
  • You may use a pencil eraser to clean the contacts. Gently brush the copper strip with the pencil eraser to remove any potential obstruction or debris. You may also use any type of lint free cloth or a coffee filter. Again, gently wipe the copper strip with the lint free cloth removing any type of obstruction or debris. 
  • Once this is complete, replace the cartridge in the cradle, close the lid and then follow any on screen prompts that may appear. 

If the problem persists after returning the cartridge to its cradle, you will want to reset your printer.

  • This can be done by turning off your computer and your printer with the cartridges installed.
  • Unplug your printer and leave your machines off for 2 minutes.
  • Restart the printer and your computer, and attempt your print again. 

If you have attempted both of these procedures and you encounter the same error, there is most likely an electrical problem with the cartridge, and you should return the cartridge to the place of purchase.

If you need to print right away and this troubleshooting did not solve the problem with your cartridge, please select the option entitled "One Cartridge Printing".
La cartouche et l’imprimante utilisées dans cette vidéo peuvent ne pas sembler identiques aux vôtres, mais les mêmes procédures utilisées dans cette vidéo peuvent être utilisées pour la cartouche pour laquell vous avez choisi de résoudre les problèmes.

If you encounter an error message stating that the cartridge cannot be recognized, is an incompatible cartridge, the wrong cartridge is installed or if your printer has blinking lights, there may be a simple solution to fix this.

This solution should also be attempted if you receive a message stating that your printer is printing in Single Cartridge Mode.

  • Confirm that the cartridge pictured matches the cartridge you have in your hand or installed in your machine.
  • Confirm that the printer you are using is listed in the printer compatibility table as a compatible printer for the cartridge you are trying to install.
  • If ONE of these TWO criteria do NOT match, you have most likely received the incorrect cartridge for your printer. Please visit our PRINTER COMPATIBILITY page in order to determine what cartridge you need for your machine.
  • Once you have confirmed you have the correct cartridge for your printer, open the cover on the printer and remove the cartridge. 
  • Upon removing the cartridge, you will need to locate the copper contacts. If the copper strip is missing, the cartridge will not function and will need to be replaced. 
  • If the copper strip is intact, you may need to clean the contacts from any type of obstruction or debris as this may be the cause of the error. 
  • You may use a pencil eraser to clean the contacts. Gently brush the copper strip with the pencil eraser to remove any potential obstruction or debris. You may also use any type of lint free cloth or a coffee filter. Again, gently wipe the copper strip with the lint free cloth removing any type of obstruction or debris. 
  • Once this is complete, replace the cartridge in the cradle, close the lid and then follow any on screen prompts that may appear. 

If the problem persists after returning the cartridge to its cradle, you will want to reset your printer.

  • This can be done by turning off your computer and your printer with the cartridges installed.
  • Unplug your printer and leave your machines off for 2 minutes.
  • Restart the printer and your computer, and attempt your print again. 

If you have attempted both of these procedures and you encounter the same error, there is most likely an electrical problem with the cartridge, and you should return the cartridge to the place of purchase.

If you need to print right away and this troubleshooting did not solve the problem with your cartridge, please select the option entitled "One Cartridge Printing".
La cartouche et l’imprimante utilisées dans cette vidéo peuvent ne pas sembler identiques aux vôtres, mais les mêmes procédures utilisées dans cette vidéo peuvent être utilisées pour la cartouche pour laquell vous avez choisi de résoudre les problèmes.

Some remanufactured cartridges come with a clip that protects the printhead and helps to preserve and maintain the quality of the cartridge.

To remove this clip, place the cartridge on a solid surface. Holding the clip with one hand, press down on the cartridge with the other hand and pull back on the clip.

You may also find it helpful to think of the clip as the tab on a soda can. Place the cartridge on a solid surface with the clip at the top. Hold the cartridge in one hand and "peel" the clip back with the other.

Some resistance is normal so don't be alarmed.

You may notice some residual ink on the pad or some ink on the printhead of the cartridge. This is also normal as some clips serve to prime the cartridge in order to allow it to function properly.

Once the clip has been removed, you may install the cartridge into your printer as normal.

If you need to print right away and this troubleshooting did not solve the problem with your cartridge, please select the option entitled "One Cartridge Printing"

La cartouche et l’imprimante utilisées dans cette vidéo peuvent ne pas sembler identiques aux vôtres, mais les mêmes procédures utilisées dans cette vidéo peuvent être utilisées pour la cartouche pour laquell vous avez choisi de résoudre les problèmes.

If you encounter an error message stating that the cartridge cannot be recognized, is an incompatible cartridge, the wrong cartridge is installed or if your printer has blinking lights, there may be a simple solution to fix this.

This solution should also be attempted if you receive a message stating that your printer is printing in Single Cartridge Mode.

  • Confirm that the cartridge pictured matches the cartridge you have in your hand or installed in your machine.
  • Confirm that the printer you are using is listed in the printer compatibility table as a compatible printer for the cartridge you are trying to install.
  • If ONE of these TWO criteria do NOT match, you have most likely received the incorrect cartridge for your printer. Please visit our PRINTER COMPATIBILITY page in order to determine what cartridge you need for your machine.
  • Once you have confirmed you have the correct cartridge for your printer, open the cover on the printer and remove the cartridge. 
  • Upon removing the cartridge, you will need to locate the copper contacts. If the copper strip is missing, the cartridge will not function and will need to be replaced. 
  • If the copper strip is intact, you may need to clean the contacts from any type of obstruction or debris as this may be the cause of the error. 
  • You may use a pencil eraser to clean the contacts. Gently brush the copper strip with the pencil eraser to remove any potential obstruction or debris. You may also use any type of lint free cloth or a coffee filter. Again, gently wipe the copper strip with the lint free cloth removing any type of obstruction or debris. 
  • Once this is complete, replace the cartridge in the cradle, close the lid and then follow any on screen prompts that may appear. 

If the problem persists after returning the cartridge to its cradle, you will want to reset your printer.

  • This can be done by turning off your computer and your printer with the cartridges installed.
  • Unplug your printer and leave your machines off for 2 minutes.
  • Restart the printer and your computer, and attempt your print again. 

If you have attempted both of these procedures and you encounter the same error, there is most likely an electrical problem with the cartridge, and you should return the cartridge to the place of purchase.

If you need to print right away and this troubleshooting did not solve the problem with your cartridge, please select the option entitled "One Cartridge Printing".

If you have installed your cartridges and receive an error message stating "Non-HP Chip detected. Cartridges have been blocked by printer firmware" we apologize for the inconvenience. HP has issued a firmware update that affects your printer model and the use of this cartridge.

Please note, to ensure continued operation of your aftermarket printer cartridges, in lieu of firmware updates, please follow these step-by-step instructions to Disable Automatic Firmware Updates on your printer.

To request a replacement item for your printer, please send the following information to support@cartridge-support.com:

1. What printer are you using?
2. Where was your product purchased?
3. What is the cartridge code(s)? (The cartridge codes are located on a small white label on the front or back of the cartridge. There will be 2 rows of numbers only - please include both rows beginning with the top row.) If you have multiple cartridges, please provide all cartridges codes and a replacement will be sent for each code you provide.
4. Shipping address for the replacement product to be shipped to. Please be sure to include city, state and zip code. Once your information is received and verified, replacement product will be shipped via 2nd day service.

To ensure continued operation of your aftermarket printer cartridges, please follow these step-by-step instructions to Disable Automatic Firmware Updates on your printer.

1. On the printers LCD screen, locate the "SETUP" icon on the main screen and press to select.
2. Scroll down and locate "TOOLS or Printer Maintenance" option and press to select.
3. Next, press "Update the Printer" from the available options.
4. Press "Printer Update Options".
5. Choose "Do Not Check”.
6. Do you want to turn on printer updates? Select "NO".

This option prevents the automatic installation of firmware updates that might otherwise eliminate your ability to use aftermarket printer cartridges.

Please note - Not all firmware updates disable cartridges, and some may contain important security updates. We suggest reviewing firmware release notes and periodically checking for critical security updates from your printer manufacturer so you can make an informed decision whether to install a particular firmware revision.***

La cartouche et l’imprimante utilisées dans cette vidéo peuvent ne pas sembler identiques aux vôtres, mais les mêmes procédures utilisées dans cette vidéo peuvent être utilisées pour la cartouche pour laquell vous avez choisi de résoudre les problèmes.

If you encounter an error message stating that the cartridge cannot be recognized, is an incompatible cartridge, the wrong cartridge is installed or if your printer has blinking lights, there may be a simple solution to fix this.

This solution should also be attempted if you receive a message stating that your printer is printing in Single Cartridge Mode.

  • Confirm that the cartridge pictured matches the cartridge you have in your hand or installed in your machine.
  • Confirm that the printer you are using is listed in the printer compatibility table as a compatible printer for the cartridge you are trying to install.
  • If ONE of these TWO criteria do NOT match, you have most likely received the incorrect cartridge for your printer. Please visit our PRINTER COMPATIBILITY page in order to determine what cartridge you need for your machine.
  • Once you have confirmed you have the correct cartridge for your printer, open the cover on the printer and remove the cartridge. 
  • Upon removing the cartridge, you will need to locate the copper contacts. If the copper strip is missing, the cartridge will not function and will need to be replaced. 
  • If the copper strip is intact, you may need to clean the contacts from any type of obstruction or debris as this may be the cause of the error. 
  • You may use a pencil eraser to clean the contacts. Gently brush the copper strip with the pencil eraser to remove any potential obstruction or debris. You may also use any type of lint free cloth or a coffee filter. Again, gently wipe the copper strip with the lint free cloth removing any type of obstruction or debris. 
  • Once this is complete, replace the cartridge in the cradle, close the lid and then follow any on screen prompts that may appear. 

If the problem persists after returning the cartridge to its cradle, you will want to reset your printer.

  • This can be done by turning off your computer and your printer with the cartridges installed.
  • Unplug your printer and leave your machines off for 2 minutes.
  • Restart the printer and your computer, and attempt your print again. 

If you have attempted both of these procedures and you encounter the same error, there is most likely an electrical problem with the cartridge, and you should return the cartridge to the place of purchase.

If you need to print right away and this troubleshooting did not solve the problem with your cartridge, please select the option entitled "One Cartridge Printing".
La cartouche et l’imprimante utilisées dans cette vidéo peuvent ne pas sembler identiques aux vôtres, mais les mêmes procédures utilisées dans cette vidéo peuvent être utilisées pour la cartouche pour laquell vous avez choisi de résoudre les problèmes.

If you encounter an error message stating that the cartridge cannot be recognized, is an incompatible cartridge, the wrong cartridge is installed or if your printer has blinking lights, there may be a simple solution to fix this.

This solution should also be attempted if you receive a message stating that your printer is printing in Single Cartridge Mode.

  • Confirm that the cartridge pictured matches the cartridge you have in your hand or installed in your machine.
  • Confirm that the printer you are using is listed in the printer compatibility table as a compatible printer for the cartridge you are trying to install.
  • If ONE of these TWO criteria do NOT match, you have most likely received the incorrect cartridge for your printer. Please visit our PRINTER COMPATIBILITY page in order to determine what cartridge you need for your machine.
  • Once you have confirmed you have the correct cartridge for your printer, open the cover on the printer and remove the cartridge. 
  • Upon removing the cartridge, you will need to locate the copper contacts. If the copper strip is missing, the cartridge will not function and will need to be replaced. 
  • If the copper strip is intact, you may need to clean the contacts from any type of obstruction or debris as this may be the cause of the error. 
  • You may use a pencil eraser to clean the contacts. Gently brush the copper strip with the pencil eraser to remove any potential obstruction or debris. You may also use any type of lint free cloth or a coffee filter. Again, gently wipe the copper strip with the lint free cloth removing any type of obstruction or debris. 
  • Once this is complete, replace the cartridge in the cradle, close the lid and then follow any on screen prompts that may appear. 

If the problem persists after returning the cartridge to its cradle, you will want to reset your printer.

  • This can be done by turning off your computer and your printer with the cartridges installed.
  • Unplug your printer and leave your machines off for 2 minutes.
  • Restart the printer and your computer, and attempt your print again. 

If you have attempted both of these procedures and you encounter the same error, there is most likely an electrical problem with the cartridge, and you should return the cartridge to the place of purchase.

If you need to print right away and this troubleshooting did not solve the problem with your cartridge, please select the option entitled "One Cartridge Printing".
La cartouche et l’imprimante utilisées dans cette vidéo peuvent ne pas sembler identiques aux vôtres, mais les mêmes procédures utilisées dans cette vidéo peuvent être utilisées pour la cartouche pour laquell vous avez choisi de résoudre les problèmes.

Some remanufactured cartridges come with a clip that protects the printhead and helps to preserve and maintain the quality of the cartridge.

To remove this clip, place the cartridge on a solid surface. Holding the clip with one hand, press down on the cartridge with the other hand and pull back on the clip.

You may also find it helpful to think of the clip as the tab on a soda can. Place the cartridge on a solid surface with the clip at the top. Hold the cartridge in one hand and "peel" the clip back with the other.

Some resistance is normal so don't be alarmed.

You may notice some residual ink on the pad or some ink on the printhead of the cartridge. This is also normal as some clips serve to prime the cartridge in order to allow it to function properly.

Once the clip has been removed, you may install the cartridge into your printer as normal.

If you need to print right away and this troubleshooting did not solve the problem with your cartridge, please select the option entitled "One Cartridge Printing"

La cartouche et l’imprimante utilisées dans cette vidéo peuvent ne pas sembler identiques aux vôtres, mais les mêmes procédures utilisées dans cette vidéo peuvent être utilisées pour la cartouche pour laquell vous avez choisi de résoudre les problèmes.

If you encounter an error message stating that the cartridge cannot be recognized, is an incompatible cartridge, the wrong cartridge is installed or if your printer has blinking lights, there may be a simple solution to fix this.

This solution should also be attempted if you receive a message stating that your printer is printing in Single Cartridge Mode.

  • Confirm that the cartridge pictured matches the cartridge you have in your hand or installed in your machine.
  • Confirm that the printer you are using is listed in the printer compatibility table as a compatible printer for the cartridge you are trying to install.
  • If ONE of these TWO criteria do NOT match, you have most likely received the incorrect cartridge for your printer. Please visit our PRINTER COMPATIBILITY page in order to determine what cartridge you need for your machine.
  • Once you have confirmed you have the correct cartridge for your printer, open the cover on the printer and remove the cartridge. 
  • Upon removing the cartridge, you will need to locate the copper contacts. If the copper strip is missing, the cartridge will not function and will need to be replaced. 
  • If the copper strip is intact, you may need to clean the contacts from any type of obstruction or debris as this may be the cause of the error. 
  • You may use a pencil eraser to clean the contacts. Gently brush the copper strip with the pencil eraser to remove any potential obstruction or debris. You may also use any type of lint free cloth or a coffee filter. Again, gently wipe the copper strip with the lint free cloth removing any type of obstruction or debris. 
  • Once this is complete, replace the cartridge in the cradle, close the lid and then follow any on screen prompts that may appear. 

If the problem persists after returning the cartridge to its cradle, you will want to reset your printer.

  • This can be done by turning off your computer and your printer with the cartridges installed.
  • Unplug your printer and leave your machines off for 2 minutes.
  • Restart the printer and your computer, and attempt your print again. 

If you have attempted both of these procedures and you encounter the same error, there is most likely an electrical problem with the cartridge, and you should return the cartridge to the place of purchase.

If you need to print right away and this troubleshooting did not solve the problem with your cartridge, please select the option entitled "One Cartridge Printing".

* Rendement de page basé sur des impressions avec une couverture de page de 5 %.

Augmentation du rendement
Close
Augmentation du rendement

Les cartouches d’imprimante remanufacturées à rendement étendu de Clover Imaging sont conçues, élaborées et fabriquées pour offrir une qualité supérieure et une performance améliorée, tout en surpassant les rendements de pages les plus élevés du fabricant d’origine. Les cartouches à rendement étendu garantissent des rendements plus élevés et un coût par page plus bas sans sacrifier la densité ni la qualité d’impression. Les cartouches d’imprimante remanufacturées à rendement étendu de Clover Imaging sont très durables et ont été certifiées par GreenCircle comme produits en circuit fermé contenant au moins 86 % de contenu recyclé. Pour les entreprises à la recherche d’une impression de haute qualité, durable et à un prix abordable, le choix est évident.

Contenu recyclé certifié
Close
Recycled Content Certified

GreenCircle is an independent, third-party ecolabel that recognizes an organization’s commitment to reuse materials to support a circular economy and reduce their reliance on virgin materials. Clover Imaging remanufactured toner cartridges are GreenCircle-certified to contain 86% recycled content and inkjet cartridges are certified at 99%.

Toner à faible émission
Close
Low-Emissions Toner

Low-emission toners used by Clover Imaging have been pre-approved by Nordic Ecolabelling for use in Nordic Swan Ecolabel-certified remanufactured printer cartridges. These toners are specially formulated to ensure that applicable Nordic Swan Ecolabel requirements are met, including criteria placing strict limits on volatile organic compound emissions and prohibiting the presence of certain pollutants and other harmful substances.

Close

Sign Up For More Information

- SIGN UP TODAY! -
Close

Thanks For Signing Up!

Register now to start saving 40% over OEM pricing

2022 Aspire Sustainability Comparative LCA, commissioned by Clover Imaging.

Information
Close
Information
Fermer
Information
Close
 
Close

 
Close

INFORMATION
Close

Êtes-vous certains de vouloir procéder à la déconnexion?

INFORMATION
Fermer

Press OK to switch region to Clover Imaging

Choix multiples
Close

Cet article est disponible pour vente inconditionnelle ou échange d'achat.
Veuillez faire un choix ci-dessous.

Récupérer les données de compte
Close
Pour récupérer vos données de connexion, veuillez entrer votre courriel:
 
Veuillez patienter...
Loader
Information

Nous vous remercions pour l'intérêt que vous portez à CIG! En raison de la fonctionnalité robuste sur notre site, nous ne pouvons que soutenir les navigateurs Web les plus courants. Nous vous recommandons de mettre à niveau votre navigateur à la dernière version de Internet Explorer, Google Chrome ou Mozilla Firefox.

Information

Votre session prendra fin dans 5 minute(s).


Information

Votre session est expirée. Vous êtes maintenant déconnecté.


Erreur information introuvable
Close
Merci
Close
Vidéo
Close
Vidéo
Close
Vidéo
Close
Vidéo
Close
Vidéo
Close
Tutoriels en ligne
Close
Téléverser logo
Close

Formats autorisés : .jpg, .png, .bmp; Max:1024x768px; Min:590x307px.

Renseignements d'expédition ()

Close
INFORMATION
Close

La création de votre document est en cours. Veuillez attendre le téléchargement.


Modalités et conditions
Close
Liste d'adresses de livraison Voir toutes les adresses
Close
Cliquer sur l'adresse pour la sélectionner
Ajouter une nouvelle Expédier-à adresse
Close
* Champ obligatoire
+1
Comment ça marche?
Close

Cliquer sur le bouton vert "Créer nouvel utilisateur"

Remplissez les champs du formulaire pour votre nouvel utilisateur. Sélectionnez les autorisations de votre nouvel utilisateur et attribuer-lui un nom d'utilisateur et mot de passe. Cliquez sur Enregistrer. Vous recevrez un courriel confirmant que le nouvel utilisateur a été créé avec succès. Suivez ces instructions pour configurer chaque nouvel utilisateur.

Après avoir créé un nouvel utilisateur, le nouvel utilisateur recevra un courriel automatisé avec son nouveau nom d'utilisateur et mot de passe. Il recevra des instructions sur la façon de changer un mot de passe s'il souhaite changer ce mot de passe éventuellement. Cependant, en tant qu'administrateur, vous pourrez toujours supprimer/modifier les utilisateurs, voir leurs renseignements de profil (y compris leur mot de passe ) et modifier leurs autorisations.

Si vous devez modifier un utilisateur, il existe des liens à côté de chaque utilisateur pour modifier ou supprimer le profil de l'utilisateur.

Si vous supprimez un utilisateur, l'utilisateur apparaîtra désormais sur la Page des utilisateurs supprimés, mais vous pouvez réactiver à tout moment si vous avez besoin de le faire.

Vidéo CIG
Close
Information
Close

Télécharger termes et conditions
Close

Formats autorisés : .jpg, .png, .bmp; Max:1024x768px; Min:590x307px.

Téléverser logo du client
Close

Formats autorisés : .jpg, .png, .bmp; Max:1024x768px; Min:590x307px.

Warning 
Close

Please note that this is a bid item that's part of the Silver Bullet program. Make sure that you have been approved to ship Silver Bullet items to this customer prior to placing an order. If this customer has not been approved, the order will be cancelled. Thank you.

Warning 
Close

Please note that at least one of selected items is a bid item that's part of the Silver Bullet program. Make sure that you have been approved to ship Silver Bullet items to this customer prior to placing an order. If this customer has not been approved, the order will be cancelled. Thank you.

Formation
Close
Courriel
Close
Pour télécharger ce certificat, veuillez saisir votre adresse courriel. Vous recevrez le fichier demandé dans les 10 prochaines minutes.
 
La collecte et l'utilisation de l'adresse courriel est régie par notre Politique de confidentialité
DÉTAILS DE LA PROMOTION
Close